
October has ushered in cooler weather, at least for a few days. The highs have been in the 70s and I am in heaven. Well, I would be in heaven if the ragweed would STOP THROWING POLLEN at me, but it’s the best I can hope for right now.
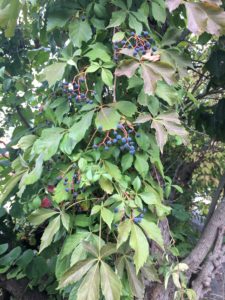
I passed a particularly pretty Virginia Creeper when leaving the shop in Oak Ridge last Thursday and had to stop and take a picture. The berries are perfect.
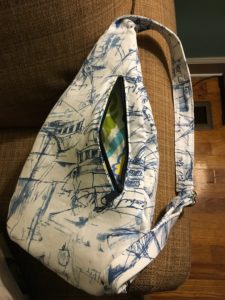
The cooler weather has given me new enthusiasm and I’ve finished the Summit Pack by Cloudsplitter Bags and Designs. Â I love the look of the bag and it is a great design, but be prepared to sew through very heavy thicknesses.
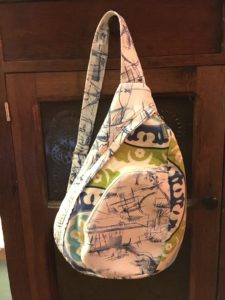
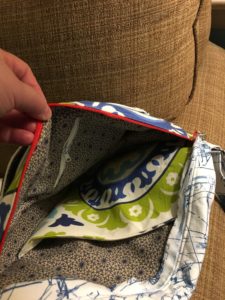
I used canvas for the outer fabric and some of the linings and quilting cotton for the rest of the linings. I omitted the card pockets since I prefer to carry my cards in an RFD-proof case.
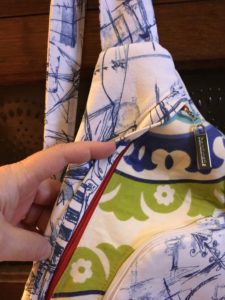
I had a little trouble following the sewing directions for the top piece and middle piece, but I eventually figured it out. I think it would have helped if the fabric used in the photos had been more of a contrast. Perhaps it’s my old eyes, but I kept getting the outer fabric and lining confused.
I hate reading directions and rely heavily on photos to get me through, only reading when absolutely necessary. I’m not sure when I started to avoid reading. I mean, I was a writer at one time! (I’m doing it now!) Although, I am slightly dyslexic and that makes a difference. I found the directions helpful, but a little confusing. I think it was probably because of the number of pieces involved. I really did study them before beginning the project–and if you try this bag, PLEASE study it before beginning.
If you are not comfortable sewing complex curves do not try this pattern! A hint: don’t pin curves. I pull the edges together as I sew, just in front of the presser foot. Remember to always stop with your needle down. I will try to get a tutorial on this technique soon–when I learn how to tape the phone to my forehead. JK. I’ve been more successful with this technique than any other I’ve tried. When I started sewing, umpteen million years ago, I spent a lot of time pinning and adjusting only to have puckers in the finished product anyway. Really frustrating!
Cloudsplitter did allow lots of extra fabric to allow for differences in sewing the seams due to fabric thickness, etc. I love how the directions say to just trim the edges to match after sewing! Most patterns have small seam allowances and make you struggle to match them. With the thickness of the layers on this bag you really need that extra.
I actually used my zipper foot for a lot of the sewing because of the thick layers of stabilizer and fabric, even when there was no zipper involved. I also used my bamboo point turner to get over the humps by shoving it under the back of the presser foot to level it out. If you don’t have anything to use like this, try pressing down the front of the presser foot as you sew. Sometimes that works.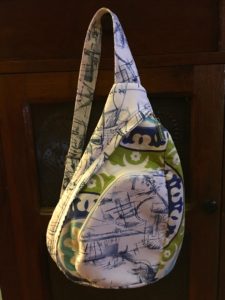
I omitted the second strap tab and I didn’t have a 1″ wide swivel hook, so I just used a 1″ metal rectangular loop. My bag came out pretty well I think.